Time to get going on construction
Ice is only 3 months away, so it is time to buckle down and focus on repairs and improvements. Click on this post to see a little write up and pictures below on the new plank for the C skeeter. If my posts get too annoyingly long, let me know. It seems like the C skeeter is telling me it wants a wider plank, because I start adding lead at about 10-12 MPH wind. So I am moving from a 16' plank to a 17' plank. The new plank will also be very hollow to reduce weight, and somewhat stiffer so the boat doesn't bottom out as easily. The total thickness tapers from 2-1/4" to 1-3/4, and the top and bottom skins are only 1/2" thick. The plank will be 13" wide in the middle and 10" wide on the ends. Here's a picture of the pile of basswood. Check out the bark, fresh from the woods. This may seem like a lot of wood, but over 1/2 of it goes up in shavings and dust!
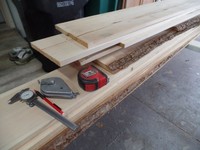
Next, we need to make boards wider, thicker and longer. The boards for the leading edge and trailing edge don't take much bending stress, so they are actually spliced from shorter boards. The board shown being laminated gets cut for the leading and trailing edges. This has to be laminated first, so the inner structure can be tapered, so we can use constant thickness top and bottom skins. The boards being widened are for the top or bottom skins. They are simply edge glued. I have best luck with NOT using any biscuts or anything to locate the joint. I simply feel along the joint to keep the boards aligned when I clamp.
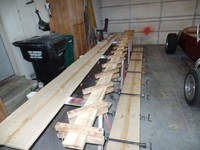
I chose to glue up the entire inner ladder structure first, which really makes the final glue-up much easier if working alone. You can see the taper in the thickness of the ladder from 1-1/4" in the middle to 3/4" at the end. The trailing edge is pretty wide because it will get cut to an airfoil shape. It is super hollow and feels light.
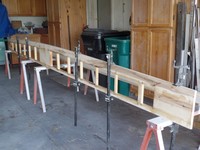
Glue-up went well. Using good quality clamps really makes things easier. These are white oak and have been used for countless projects over the years. I glued this up at 5-1/2" crown, which will spring back to a 5" crown. Very important ensure the middle and ends are perfectly level before tightening clamps. The outer skins are only 1/2" thick.
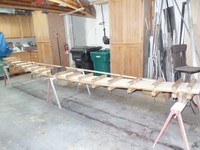
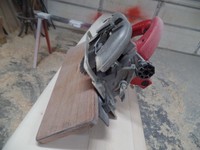
Here's the sled attachment for the circular saw. It gets used to rough cut the plank trailing edge, and I also use it for rough cutting wood mast leading and trailing edges.
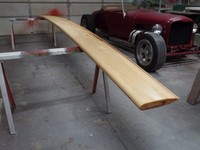
Plank shaping is complete. I really thought the stiffness would be super low because of the thin 1/2" top and bottom skins. I was surprised to see that it ended up pretty stiff just with the wood. This greatly reduces the amount of carbon fiber that will be necessary. The plank has a 5" crown, and I am shooting for a spring rate of about 110 lb/in, so the "go flat" weight will be 550 pounds. Many DN skippers are surprised by how low the spring rates are on a skeeter, but it is a huge part of what helps absorb the puffs. When a big puff hits you in the skeeter, it feels like the seat bottom just disappears. The plank is now ready for carbon fiber.
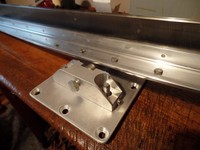
Billet aluminum chocks are super cool, but they sure are a lot of hours on the milling machine. Notice the adjusting set screws on the ends of the pillow blocks for the runner alignment. These use bushings in the pillow blocks, not bearings. The runners still pivot almost the same as a ball bearing pillow block, so my opinion has been that ball bearing pillow blocks really don't result in a difference, so I just keep it simple. The plates get glued to the plank, and the 12 flat head bolts just get glued into the plank. There is no top plate. I've done a couple like this, and I haven't had one get pulled out yet.
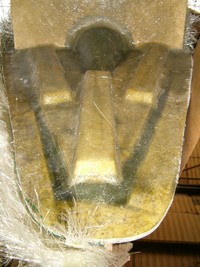
shaping technique
Great write up. Thanks for taking the time.
Can you describe your technique for shaping the plank? You've always produced incredibly consistent planks side-to-side. Shape plane with a sharper eye? Or do you use some sort of template and router?
Browner
Easy shaping
This plank is super easy to shape. Note that this is not a full airfoil shape. The leading edge is rounded, and the trailing edge is tapered, so it is a psuedo-airfoil. I prefer this shape because it requires less carbon than a full airfoil because a greater amount of the width is the full thickness vs. a true airfoil where only one point is the full thickness. I don't think there is any drag difference.
On the leading edge, I simply use a router with a round-over bit and a fence. This plank tapers in thickness from 2-1/4" in the middle to 1-3/4" on the ends. I used a 7/8" radius bit which gives a perfect round on the ends, but a little bit of a flat spot in the middle of the plank, which then gets further shaped with hand plane and sander to be truely round.
On the trailing edge, I use the sled pictured above on the circular saw to make an initial tapered cut of 3/4" at 20 degrees. Again, since the plank is tapered, it needs more removed in the middle, so I follow up with a powered hand planer (Dewalt DW680K) and belt sander, until I get a perfectly uniform taper to a 1/16" thick trailing edge. Then I further round the trailing edge into the width of the plank with the powered hand planer and belt sander. I didn't keep track, but I think total shaping time was maybe only 6 hours, 3 beers and 2 garbage cans.
Although this method above is super easy and doesn't take a true craftsman to get it right, keep in mind that in the old days, all skeeter masts and planks were shaped with a hand plane, no power tools, without ever taking a rough cut with a saw. I have done this many several, and it is a very rewarding experiance when you have multiple garbage cans of wood curlings all generated by hand. My hand plane for doing it this way is probably 100 years old, about 30"-36" long, and weighs a bunch. Not sure of the Stanley number, but it is an awesome tool that is perfect for spars. The weight and length is what makes it work.
Scott, on somewhat a related note, not sure if you have noticed how Joe Norton has been building Nite spars. His are constructed almost like the old DN "stripper" masts out of four pieces. For the Nite, there is no question that this is superior to the original design. Better material usage, much less shaping required, more optimal hollow profile. Worth taking a look at if you have not already.
yes, and no
I've seen Joe's "slanted box" Nite mast. The dude's a wizard. Not sure it's legal, or faster.
I have a solution that fits within the scantlings. It's similar to how you shape your plank. I lop off the sides of the mast with a table saw, and then finish with hand planes and sanding blocks.
Thanks again for all your input.
Browner